
Pattern Forge: drafting a sewing block
Draft a bodice, body, trouser or bodysuit block, a circle skirt, a cloak, a hood or a tabard to your own measurements, then print it at true scale and trace it onto fabric.
Pattern Forge drafts a block — the plain, close-fitting foundation shape that costume patterns are built from — to your own measurements, and tiles it across ordinary printer paper so you can tape it together and trace it.
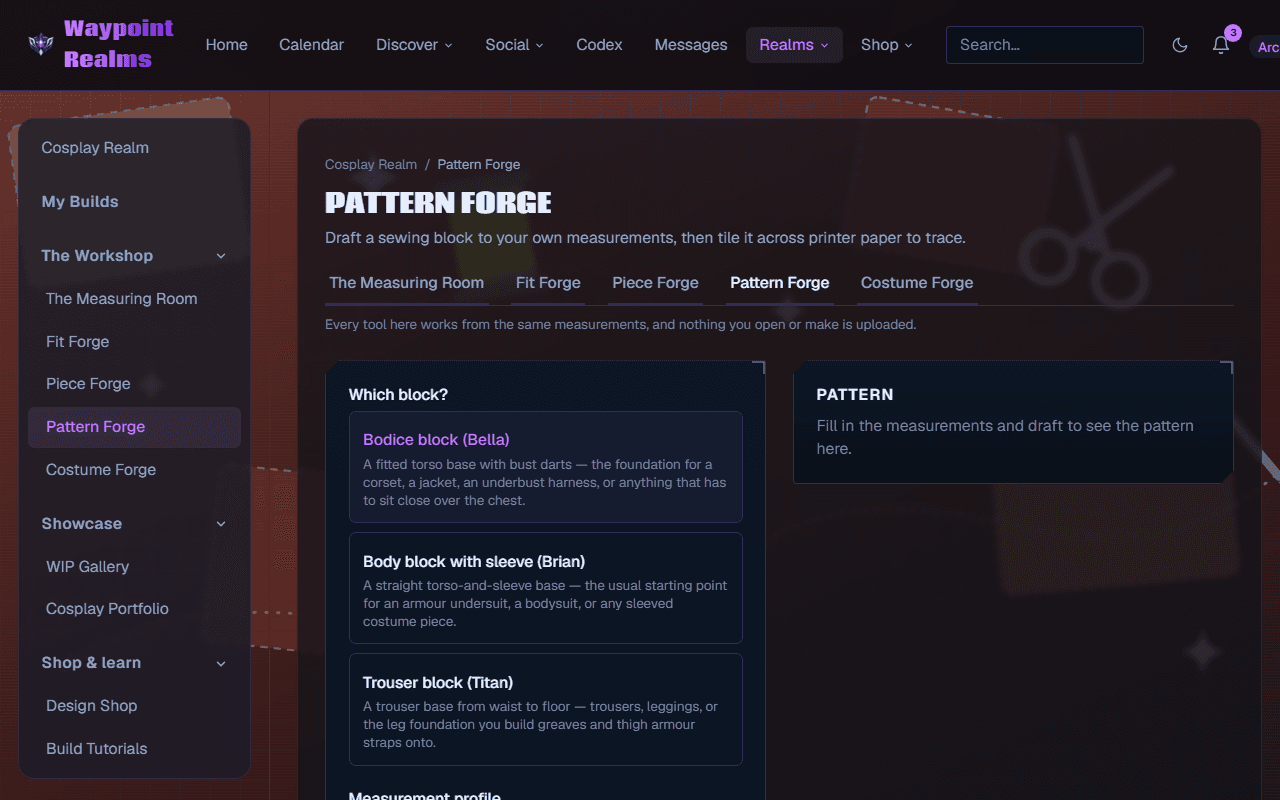
The blocks
- Bodice block (Bella) — a fitted torso base with bust darts. The foundation for a corset, a jacket, an underbust harness, or anything that sits close over the chest.
- Body block with sleeve (Brian) — a straight torso-and-sleeve base. The usual starting point for an armour undersuit, a bodysuit, or any sleeved piece.
- Trouser block (Titan) — waist to floor. Trousers and leggings, or the leg foundation you build greaves and thigh straps onto.
- Bodysuit (Onyx) — a one-piece suit with raglan sleeves, for stretch fabric: a zentai, an undersuit to wear under armour, a hero suit or a leotard.
- Circle skirt (Sandy) — a full, half or quarter circle on a waistband: a magical-girl skirt, a ball-gown overskirt or a petticoat.
- Cloak (Lunetius) — a lacerna, the Roman travelling cloak: one big panel that drapes over the shoulders. Ranger, wizard and pilgrim cloaks, capes and mantles.
- Hood — three panels sized to your head and neck, to sew onto a cloak, a tunic or a tabard. It needs only those two measurements.
- Tabard — one long panel that drops over the shoulders, open at the sides: a knight's surcoat, a herald's tabard, or a ground for painted heraldry. Its neckline is bound with bias tape, so it is cut on the line with no allowance. A round or square neck too small to pass your head gets a slit marked down the front; a V is cut deep enough not to need one.
All but the hood and the tabard are FreeSewing designs; those two are drafted the same way here, so they print, project and download exactly like the rest.
Drafting one
Pick the block
Under Which block?: Bodice, Body, Trouser, Bodysuit, Circle skirt, Cloak, Hood or Tabard. Choose by what you are making, not by what you own. A breastplate strapped over a long-sleeved top starts from Body (the Brian block); a full undersuit from Bodysuit; a corset from Bodice (the Bella block).Fill in what it needs
Each block lists the measurements it requires and counts how many are still missing. They pre-fill from the measurement profile the Workshop has selected, or you can type them all by hand. A number that came from a camera reading the Measuring Room was less than sure of says so — worth a tape check. Each missing measurement has a Measure it › link to the Measuring Room, whose Back to Pattern Forge → link returns you. The block goes back to Bodice and numbers you typed but didn't save are cleared, so save them to your profile first. Numbers you type can be saved back to your profile; numbers you left alone keep their record of how they were taken.Draft
Draft pattern works once every required measurement is in. The pattern is drawn beside the form, and from then on any change — a measurement, the block, the ease, the seam allowance — redraws it a moment after you stop typing. This is the cheap place to be wrong, long before fabric.Choose the style
Most blocks have a Style section with the main choices its design offers, each explained beside it. The skirt's fullness and length; the cloak's and the tabard's length and width; the skirt's gathering and straight or curved waistband; the bodysuit's sleeve and leg length, neckband or hood, front, back or no zip, and a skirt; the tabard's neckline; the body block's lengths; the trouser block's leg length, waist height and shaping to the knee. Each block keeps its own choices while you switch between them.Set ease and seam allowance
Ease is how much room the block leaves over your measurements: Standard is the block's own, Close hugs the body, Loose leaves more to move in. On the bodysuit, Close is cut smaller than you, as a swimsuit is, for a fabric that stretches. The skirt, cloak and tabard have no ease to set — how much room they leave is their fullness or width. Seam allowance (cm) starts at 1.0. Dimensions on (paperless) writes the measurements onto the draft, for redrawing it by hand.Print at true scale
Choose A4 or US Letter — the choice is remembered, and shared with Piece Forge — and switch to Tiled to see the sheets. The print run counts how many it takes. Open print sheets (Pro) opens a page ready to print. It turns the sheets landscape when that takes fewer, and, when it takes more than one sheet, starts with a sheet map: the whole pattern with every sheet outlined and named (A1, A2… along the top row, B1… below), beside a check square. Neighbouring sheets overlap by 10 mm, and the shared band carries crosshairs labelled with both sheets — lay one sheet over the other until the crosshairs sit exactly on top of each other, then tape. Turn off “fit to page” and “shrink to fit” in your print dialog — both silently rescale the pattern, and a rescaled block is not your size any more. Before you cut, measure the check square with a ruler: it is 100 mm a side, or 4 in if you work in inches. (A one-sheet print has a check square only where there is room beside the pattern.)Or print it at a copy shop
Under For a copy shop, choose A1, A0, ARCH D, ARCH E or a 36-inch roll and press Open copy-shop sheet (Pro). Most blocks fit on one A0 sheet or one length of roll, with the check square beside the pattern; anything bigger tiles across as few large sheets as it takes. Choose Save as PDF in the print dialog and send the shop the file, asking them to print at 100%.Or download it
Download SVG saves the draft as one file. Download DXF saves it in millimetres for a plotter, a cutting machine or a CAD program, with the cut line (seam allowance included), the stitch line and the markings on separate layers. Both downloads are Pro.Or project it onto your table
With a projector over your cutting table, Project onto your table shows the pattern life-size, bright lines on black, so you can cut straight from it. The first time, calibrate: drag the four yellow corners onto four marks on your mat that make a rectangle you know (the corners of a 40 × 30 cm square on a gridded mat, say), and enter its size. That corrects a tilted projector as well as setting the scale; check one grid square with a ruler. Then switch to Project, choose which lines to show — cut lines, seam allowance, markings, help lines, labels — and move the pattern with the arrow keys or by dragging. The calibration is remembered on this device.
Drafting for several people
Sewing for a group, or for clients? Several people, beside the print run, lists your own measurement profiles, then the measurements members of your group cosplays have shared with the group. Sharing is for members 18 and over, in an active group. Tick two or more and Pattern Forge drafts the block for each of them from their own numbers, with the same style, ease and seam allowance, and lays the patterns out together under their names. They print as one run of sheets, one download, one projection. Anyone missing a measurement the block needs is named and left out until it's measured. The selected profile drafts from the form, so numbers you type count for it straight away.
Drafting for a build
Pattern ›, in the in the workshop panel of a build in My Builds, opens Pattern Forge for a piece you are making. Once you print or download the draft, the build lists it against the piece.
Where it runs
In your browser. The draft is computed on your device and the pattern itself is never uploaded. When you print or download it, Pattern Forge keeps a note of the draft — which block, which profile, the seam allowance, the paper and how many sheets — so a build can list it.
Was this helpful?